Mixing cement and mortar is an essential skill for various construction projects, from building walls to laying bricks and tiles. Whether you’re a DIY enthusiast or a beginner in construction, learning how to mix these materials correctly will ensure your projects are strong, durable, and long-lasting. In this guide, we’ll walk you through everything you need to know about mixing cement and mortar, including the tools, materials, and techniques for the perfect mix.
What is Cement and Mortar?
Before diving into the mixing process, it's important to understand the difference between cement and mortar:
· Cement is a fine powder made from limestone, clay, and other materials. When mixed with water, it forms a paste that hardens and binds materials together. It is a key ingredient in both concrete and mortar.
· Mortar is a mixture of cement, sand, and water, sometimes with lime added to improve its workability. It is used to bond bricks, stones, and other masonry units together.
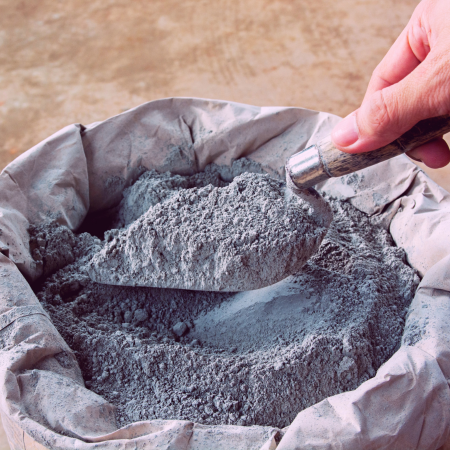
Tools and Materials You’ll Need
To mix cement and mortar, you'll need the following tools and materials:
Tools:
· Mixing bucket or wheelbarrow
· Shovel or hoe
· Trowel
· Measuring container
· Dust mask, gloves, and safety goggles
· Hose or water supply
Materials:
· Cement
· Sand (fine or masonry sand for mortar)
· Water
· Optional: Lime (for improved workability)
Step-by-Step Guide to Mixing Cement
Let's start with mixing cement, which is the foundational material for mortar.
Step 1: Measure Your Materials
The correct ratio of cement to sand is crucial for a strong, durable mix. A common mix ratio for cement is 1 part cement to 3 parts sand. However, the ratio may vary depending on the project.
· Use a measuring container or a bucket to measure your materials accurately.
· Always start by measuring the dry components (cement and sand).
Step 2: Prepare Your Mixing Area
Choose a flat, clean surface to mix your cement. A wheelbarrow is ideal for small projects, while a clean section of concrete or a mixing tray is better for larger quantities. Make sure the area is dust-free to prevent contaminants from weakening the mix.
Step 3: Combine Cement and Sand
· Pour the measured sand onto your mixing surface or into your wheelbarrow.
· Create a crater or well in the centre of the sand pile.
· Add the measured cement to the well.
Step 4: Mix Dry Ingredients
· Use a shovel or hoe to mix the dry ingredients together. Combine them thoroughly until the mixture is uniform in colour and texture. This step ensures that the cement is evenly distributed throughout the sand.
Step 5: Add Water Gradually
· Slowly add water to the dry mix. Start with about half the amount of water you expect to use, and then mix.
· Use a shovel or hoe to fold the mixture over itself, turning it from the outside to the centre, ensuring even moisture distribution.
· Add more water as needed, a little at a time, until you achieve a smooth, workable consistency. The mixture should be wet enough to hold together but not so wet that it becomes runny.
Step 6: Test the Mix
To test the cement mixture:
· Scoop a small amount of the mix onto a trowel and turn it over.
· The mix should slide off easily but still hold its shape. If it’s too dry, add a little more water. If it’s too wet, add a small amount of cement and sand in the correct ratio.
Step-by-Step Guide to Mixing Mortar
Now that you have a basic understanding of mixing cement, let’s move on to mixing mortar.
Step 1: Measure Your Materials
A standard mortar mix ratio is 1 part cement, 4-5 parts sand, and 1 part lime (optional). Lime is added to increase the workability and flexibility of the mortar, making it easier to apply.
Step 2: Prepare Your Mixing Area
Follow the same preparation steps as with cement: choose a flat, clean surface or a wheelbarrow, and ensure it is dust-free.
Step 3: Combine Cement, Sand, and Lime
· Pour the measured sand onto your mixing surface.
· Create a crater in the centre of the sand.
· Add the measured cement and lime into the crater.
Step 4: Mix Dry Ingredients
· Use a shovel or hoe to thoroughly mix the dry ingredients together until the colour and texture are consistent. This will ensure an even distribution of cement and lime throughout the sand.
Step 5: Add Water Gradually
· Slowly add water to the dry mix, starting with about half the expected amount.
· Use your shovel or hoe to mix by turning the mixture over itself, just like with cement.
· Gradually add more water until the mortar reaches a smooth, peanut-butter-like consistency. It should be thick enough to cling to a trowel but not so thick that it’s hard to spread.
Step 6: Test the Mortar
To test your mortar:
· Scoop some onto a trowel and hold it vertically. The mortar should stick to the trowel without sliding off.
· If it’s too stiff, add a bit more water. If it’s too wet, add small amounts of sand and cement in the proper ratio.
Tips for a Perfect Mix
1. Work in Small Batches: Mix only the amount of cement or mortar you can use within 2 hours. Both materials start to harden once mixed with water.
2. Keep Tools Clean: Clean your tools immediately after use. Hardened cement or mortar is very difficult to remove.
3. Additives: Consider using plasticizers or other additives if you need specific properties like faster setting or increased bonding.
4. Weather Considerations: In hot weather, mix smaller batches to prevent premature drying. In cold weather, use warm water to speed up the curing process.
Safety Precautions
· Wear Protective Gear: Always wear gloves, a dust mask, and safety goggles to protect yourself from cement dust and splashes.
· Ventilation: Ensure proper ventilation when mixing cement or mortar indoors.
· Avoid Skin Contact: Cement can cause skin irritation or burns. Rinse any cement off your skin immediately with water.
Mixing cement and mortar might seem daunting at first, but with the right tools, materials, and techniques, you’ll be well-equipped to handle a variety of DIY projects. Remember to measure carefully, mix thoroughly, and test your mixture for the right consistency. With practice, you’ll be able to achieve a strong and durable mix that stands the test of time.
Speak to your local branch now for more advice and to see our range of cement and mortar.